Showing posts with label FMQ. Show all posts

Thursday, July 21, 2016

Raw Edged Flower Lap Quilt Finish

 My mom wanted a little lap quilt to keep her warm. So using the left-over fabric from her Chevron quilt I made her back in 2014, I made this little flower quilt for her. It measures 33' x 51".
This is it BEFORE I washed it.

 The Quilting

 Soooo after psyching myself out by looking on Pinterest and others blogs for quilting ideas, I finally just jumped in and first started by FMQ on and around the flowers.  I then added a little "anchor" flower in the center where four corners of the flowers met. I also stitched in the ditch the entire perimeter of the quilt top. Then a had a flower border pantograph that was the perfect accent!
I used this Soft &Comfy brown 100% polyester fabric for the backing.
 I was a little dissatisfied when I saw how "wiggly" it ended up. 

Here's a close-up of the quilting on the front...like my little stitched note to my mom? (smiles!)
See that wiggle...ugh! But wait!

After Washing

Look at the difference once I washed this little quilt! 
The borders are all straightened up. Wiggle gone. I've never used this kind of backing before, so I was careful not to pull it too tight on the frame and more than pleased to see how it tightened up after it was washed. I think the quilting was perfect...balanced and not too dense, which is what I wanted.

Just look at those flowers with their little ravel started!!
It makes me happy to know how much my mom will use this little quilt and inspires me to get back to sewing my queen size raw edged flower quilt I have started! Sometimes a little project in-between the big projects is kinda rejuvenating isn't it?! As always, thanks for stopping by and visiting.

HEY! JOIN US for my Fourth Annual Piggy Bank Challenge.
Click HERE to read more about it. Help spread the word and join in!
Click the picture to read more!

Val's Quilting Studio

Thursday, March 17, 2016

FMQ: Play Ball!

 Many of you know I enjoy quilting for Project Linus....
And well, I thought this one made an appropriate share for Saint Patrick's Day!!
Image result for leprechaun
I especially enjoy when the Project Linus ladies give me a fun strip quilt like this one below.
It provides the perfect opportunity for me to practice my free motion quilting: 

I wish I took a picture of this quilt before the quilting (I need to get better at that) as the quilting, with it's wishbones, stars and spirited words, transformed this fun flimsy into a quilt some little guy, somewhere, will really love. (At least that's what the PL ladies said when I dropped it off.) 
Happy Quilting for sure.
Wishing you a little luck of the Irish!!
Click on the picture to read more about Project Linus:
I volunteer here:

Sunday, September 13, 2015

Elmo Quilt Part 2 of 3

This quilt is brought to you by the letter Image result for elmos and letter J and the #Image result for elmo and number 2

Oh this quilt has been fun and easy to make! Always fun to see a quilt transform from this (Part 1)

...to this, isn't it! 
Elmo and the background are both flannel. I had fun free-motion quilting this one with squiggles, circles and hearts using a rainbow thread. I outlined all the letters and Elmo's body, mouth, neckline and couldn't resist a big heart on his body. (And now that I'm thinking about it, I probably should have quilted around his nose....oh well, it's already in the wash.) I think it will fine. The whole quilt is only 3'x3' and I didn't want the quilting to be too dense as it's just big enough for our two year grand guy to drag around as his cuddle quilt. (Pssst...I even machine sewed the binding on! I know go figure, me the Queen of Hand Binding! LOL!)

As much as he loves Elmo, I think he's also going to love the softness of 
this fleece backing embellished with a BIG #2:
I can't wait for our little guy's birthday party next weekend!
 I know his reaction is going to be priceless, for as many of ya have commently previously, Elmo has been a fav of toddlers since our kids were young.  See his reaction by clicking right here: Elmo Series Part 3 post. (LOL!)
I know, I'm having too much fun today! 
Anyhoo....hubby is working a late shift today, so I'm off to start my Dog Gone Cute blocks.
That's what's going on in my little sewing world. So glad ya stop by!

Val's Quilting Studio
Everytime you link and share here at Tuesday Archives you will be entered you into a monthly drawing for a $15.00 Gift Certificate to: (pretty cool huh!)

Winners will be announced the first Tuesday of every month! Thanks for stopping by!

Thursday, May 28, 2015

HMQS Inspiration: FMQ

Why hello friends. Today is the final post in my HMQS Inspiration Series. 
I was completely inspired by Helen and Jenny who developed the Curve-It Up rulers and blog at Sew Kind of Wondeful.  After taking their two hour lecture class, I left with a "can do" attitiude!
They taught us to look at the negative space and not just fill it in, but to echo your peicing:

They taught about point to point quilting and 

to use repeated patterns as fillers. 

They also recommended just quilting one block at a time. 

I really liked their teaching style. Jenny would demonstate the techniques on the longarm, projected onto a big screen as Helen sketched the same elements on a large poster paper. It was so easy to follow along and learn. Boy, if ya ever get a chance to take one of their classes, I can't imagine anyone walking away disappointed. Our blog buddy Barb even won the class sample! (Hop over to see how she has already applied our lessons. Her quilting on this Christmas Quilt is beautiful!)

I know this little sampler pattern that came free with the cutting ruler is one of the first sewing/quilting projects on my summer to do list! It will be the perfect sewing machine mat.

My class lessons made my tour of the quilts much for educational. I found myself looking at others creative work with a new eye for negative space.  Here's a few of my favorites:


And who wouldn't want this one hanging in their sewing room!
I hoped you enjoyed my little series of inspiration as much as I enjoyed writing them. It was helpful for me to "process" all that was seen and learned in just a few days here on the ol' blog. Please do stay tuned as in June I'll have time to start applying my lessons learned to my own quilting. I can't wait! .

Wednesday, May 6, 2015

HMQS Utah...Here I Come!

Yep! I'm on a plane very early in the morning! Destination: Salt Lake City,Utah.  
I can't think of a better way to use two personal days from teaching than attending a huge quilt show and classes with a friend! We are taking a class by Gina Perkes. 
 OMG! 

Our hands-on, long-arm quilting class with Gina is called Modern Love.
Description: Modern quilts provide a fabulous canvas for showcasing gorgeous quilting designs! Discover new quilting designs which will enhance your modern quilt tops. You will learn the basics of ruler/grid work, new modern fill designs and more. You will also come away with trouble shooting info.  and tips for decorative thread success!  

We're also attending a lecture class by Gina called: How Do I Quilt This?
Description: Gina will take you through the process of determining how to quilt a quilt through a power point presentation. Students will discover how to identify the style and purpose of their quilts or those of their customers, then how to create an appropriate quilting plan. Students will have the opportunity to email pictures to Gina ahead of time to be discussed in class. (I can't wait to get her input on the quilt pictures I sent her!)

Finally, we have one more lecture titled: Curve It Up-A Fresh: Look to Custom Quilting  
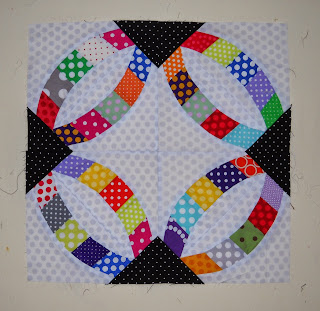
This class will certainly come in handy when I go to quilt my Modern Rings:
Description: We'll learn the fun and easy techniques Jenny Pedigo and Helen Robinson of Sew Kind of Wonderful use to add curves to custom quilting. Go beyond fillers and feathers by adding curves to create secondary designs. Learn how to add curves to borders, piecing and open spaces to give your quilting a fresh contemporary look. 
As you can probably tell, I'm a little ( okay...way) excited. So....if you are there and spot me, please do say hi! It would be great to meet in person! And....because probably only a minimal fraction of my followers are even in the remote area of Salt Lake City this week (lol!)....no worries....I plan to share my experience with an upcoming series of Thursday Inspiration posts for the remainder of May, followed by posts documenting my summer implemetation of  lessons learned. Admittably I'm a little over excited that I get to use personal days from work to better myself as a quilter. ( Oh my! Life is good!) Seriously though, when I told my second graders that I would be gone on a "trip" and would see them Monday...it was like seeing the word FREEDOM in bold letters!  Thanks for being patient with me today...I'm a veteran teacher and a novice quilter. It feels good to be learning something new!!!

Tuesday, May 5, 2015

Tuesday Archives # 61: QAYG

Welcome to the linky party that rejuvenates your old quilting/sewing posts! 
Please click here to read more about this linky party.  
Val's Quilting Studio

This week's theme is: QAYG: Quilt As You Go

Admittably, I've never tried this method of quilting.  I found myself poking around the internet and found this very informative (and cute!) website/blog. It's called Shiny Happy World and she has an entire series of QAYG video tutorials!  I found myself thinking as I watched some of the vides, that even if you don't use the QAYG method, these are some great FMQ tips! You can click  here to see a list of her entire series of lessons.
Quilt As You Go #7 - How to Quilt a Blades Pattern - Video tutorial from Shiny Happy World


Tuesday, January 20, 2015

Tuesday Archives #46: Modern Quilts

Val's Quilting Studio
Happy Tuesday Archives everyone!

Today's theme is Modern Quilts.


A quote from the Modern Quilt Guild helps us define the genre today:
"Modern Quilters bring a new bold new aethetic to a craft dominated by traditional and art quilting. The clean lines and stylish color schemes prevalent in moder quilting appeal to fans of sophisticated modern design."

I'm a huge fan of Victoria Findlay Wolfe and follow her blog for Modern inspiration!
I'll be on Pat Sloan's Show

In 2012 (preblogging) I made this Modern Style quilt for our son-in-law.  He was a paramedic at the time so collecting this variety of fabric was fun! My husband actually picked out the large numbers print to represent them using "radio codes".

I gave it a cozy flannel backing and had alot of fun free motion quilting this one!

And as you can see...he LOVED it!


Wednesday, January 7, 2015

Scrappy Tulip Bed Quilt

After writing yesterday's Tuesday Archive post about Machine Applique, I was reminded of this quilt I made before I started blogging (Oct. 2012). This wonderful assortment of 56 scrappy tulips were inspired by Kim Schaefer's Flower Festival book (it includes 50 Applique Blocks to "grow your garden").I took her Tulip Lap Quilt pattern and grew it into this queen size quilt. After having been displayed in the local quilt store for a bit...

...it found it's way to my parent's geust room. My mom was so kind to actually text me most of these pictures yesterday and flattered me when she replied:
"I only let special guest actually use the quilt." LOL!! 

The Applique Process:

I really did have alot of fun creating these little appliqued flowers... 

...and watching them grow on my design wall.

I used a button stitch to machine applique each flower to it's neutral back.


Here's a few close-ups of my our favorite tulips:

We love our dogs!
We enjoy our wine.

Quilting Trick:

Here's a great way to "try out" some designs without having to use a seam ripper later! Save your dry cleaning plastic or use any other thin plastic and lay it over your quilt. Then, using a black sharpie, doodle your FMQ patterns.
 As you can see, we kept this quilting simple.

The Back:

And don't ya love when you have enough fabric leftover from another project to create a back...it's like the BEST freebie isn't it! I had enough scraps from the tulips and fabric from my Underground Railroad Quilt to create a scrappy back:

With a special label:
Thanks for the pictures mom and for taking such good care of this quilty hug!
With smiles!
Val:)
Related Posts Plugin for WordPress, Blogger...